EDUDOTNET

Wednesday, November 15, 2017

Wall Post (Share Button) to Your Facebook Account Wall Using JavaScript SDK


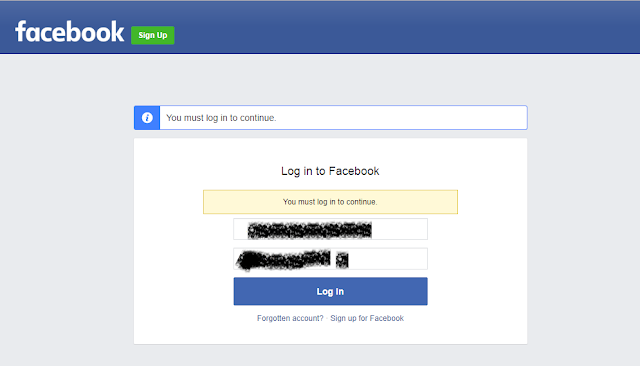
1.       1. Go to Facebook developer section and login your Facebook`s developer account. By clicking on login button and enter your user name & password.


2.       2. After login redirect to developer dashboard section, from there you can create your own app by selecting dropdown “My Apps” and by clicking on “Add a New App”.  It will be redirect to next step where you can able to create your own app.

3.       3. After clicking on “Add a New App” from developer dashboard. Open a popup called “Create a New App ID”. Here you can able to enter your App name and contact email id. App Name is a display name so enter a friendly Display App Name. Click on “Create App ID” button.

4.       4. After creating App ID you will direct to App Dashboard where you can able to set up your App and change app settings. You can get here App ID & App Secret and also update other information.  By clicking on “+ Add Platform” button to add your platform where you will implement your App ID.


5.       5. On this screen you can select your platform where you will implement your App ID eg. Website, iOS etc. As per now you can select “Website” and save all app changes by clicking on “Save Changes” .


6.       6. After adding the platform, under website platform section enter site url eg. Localhost or www.yoursite.com etc. and click on “Save changes” button.

7.       7. Now, you can click on quick start button from website platform section. Follow all steps mention in below screen and JavaScript SDK code and enter your site url > click on Next button to complete the process.  Click on “Share” box end of the screen and it will redirect to new window.


8.       8. Here you can able to select your App and get code by enter require information.  Set up your facebook share button as per your requirement and also able to customize.  Click on “Get Code” button. In next screen you can able see code.


9.       9. Finally, you got the code of your JavaScript SDK and share button.  Here you can able to changes / select your App ID & language. Copy the code and this code paste wherever you want to display this plugin/button.


110.   You can able to customize JavaScript SDK code provides by facebook. You will able to add custom message eg. Title, image etc.

Code:
<div id="Facebook_Container" style="text-align:center;">
</div>
<script type="text/javascript">
    $(document).ready(function () {
        createHtml();
    });

    //create html //
    function createHtml() {
        var title = "Join Our Application & Enjoy With Friends.";
        var summary = "Join Our Application by clicking on this post and you get connected with friends. ";
        var url = "https://www.mydomain.com/Account/Register/@Id";
        var image = 'https://www.mtgtrade.com/Content/Images/Logos/AuctionWorxLogo1.png';
        var appid = '<%=ConfigurationManager.AppSettings["FacebookConsumerKey"].ToString() %>';

        //login pop height, width
        var w = 600;
        var h = 400;
        var left = Number((screen.width / 2) - (w / 2));
        var top = Number((screen.height / 2) - (h / 2));
        //****//


        //facebook login window and pass paramemters like title, summary, url, image
        var fb = '<a rel="nofollow" class="btn-facebook"   title=\"Share this post on Facebook\" onclick="FbApp_Login(\'' + title + '\',\'' + summary + '\',\'' + url + '\',\'' + image + '\');"><i class="fa fa-facebook-square"></i>Share On Facebook</a>';
     
        var socialMediaButtons = fb;


        //bind social variables into div
        jQuery("#DetailDiv").append('<div><table width="100%"><tr><td valign="top"><div>' + socialMediaButtons + '</div></td></tr></table> </div>');
        //****//
    }


    // Facebook login
    function FbApp_Login(title, summary, url, image) {
        FB.login(function (response) {
            if (response.authResponse) {
                statusChangeCallback(response, title, summary, url, image);
            }
        }, { scope: 'email,user_photos,publish_actions' });
    }


    window.fbAsyncInit = function () {
        FB.init({
            appId: '***************',//--App ID
            cookie: true,  // enable cookies to allow the server to access
            xfbml: true,  // parse social plugins on this page
            version: 'v2.0' // use version 2.0
        });
    };


    // This is called with the results from from FB.getLoginStatus().
    function statusChangeCallback(response, title, summary, url, image) {
        if (response.status === 'connected') {
            // Logged into your app and Facebook.
            FB.ui(
              {
                  method: 'feed',
                  name: title,
                  link: url,
                  picture: image,
                  caption: title,
                  description: summary,
                  // source: url,
                  redirect_uri: url,
              }
        )

        }
    }


    // Load the SDK asynchronously
    (function (d, s, id) {
        var js, fjs = d.getElementsByTagName(s)[0];
        if (d.getElementById(id)) return;
        js = d.createElement(s); js.id = id;
        js.src = "//connect.facebook.net/en_US/sdk.js";
        fjs.parentNode.insertBefore(js, fjs);
    }(document, 'script', 'facebook-jssdk'));

</script>

11. UI Interface

Friday, April 28, 2017

How to convert and bind JSON string in to asp.net GridView with c# without help of looping and object mapper class (wrapper)?


How to convert and bind JSON string in to asp.net GridView with c# without help of looping and object mapper class (wrapper)?
Requirement: - If we don`t know about json string/object, how many columns are there and no any idea of column name, In this case we can`t able to create a c# class for object deserializeObject, I mean wrapper class. Here requirement is bind gridview from json object without ajax/jquery and looping in c# and without wrapper class.

1.       Create a web application in visual studio


2.        Right click on project and add a web form by click on "Web Form".


3.        After that open a windows popup in this enter your Web Form name and click on "Add" button.


4.        Open your web form .aspx source/design part and go to ToolBox and drag & drop asp.net gridview control in to web form and set gridview style as per your requirement.


5.        Here way to bind gridview from JSON following:
a.        Using dynamic keyword with JsonConvert.DeserializeObject, here you need to import Newtonsoft.Json
b.      Using DataTable with JsonConvert.DeserializeObject, here you need to import using System.Data;


Dynamic:
This is a data type, dynamic data type introduced since .Net Framework 4.0. The dynamic data type allows you to perform any operations and will be resolved at run time. It does not require explicit type casting for any operation at run-time, because it identifies the types at run-time only. Dynamic type can be passed as function argument and function also can return object type. Useful when coding using reflection or dynamic language support or with the COM objects, because we require to write less amount of code. [http://www.c-sharpcorner.com/blogs/variable-object-and-dynamic-data-type-in-c-sharp1]

DataTable:
In .NET, it's a class that represents a table of in-memory data.


CODE
.ASPX
<%@ Page Language="C#" AutoEventWireup="true" CodeBehind="BindJosn2Grid.aspx.cs" Inherits="BindJSON2ASPDOTGridView.BindJosn2Grid" %>

<!DOCTYPE html>

<html xmlns="http://www.w3.org/1999/xhtml">
<head runat="server">
    <title></title>
</head>
<body>
    <form id="form1" runat="server">
    <div>
        <h2>Bind GridView From JSON Object (Converted In to Dynamic Object [dynamic keyword])</h2>
        <asp:GridView ID="grdJSON2Grid" runat="server" BackColor="White" BorderColor="#3399ff"
            BorderStyle="Dotted" BorderWidth="1px" CellPadding="3" GridLines="Both"></asp:GridView>

        <br />
        <br />
         <h2>Bind GridView From JSON Object (Converted In to DataTable Object [DataTable])</h2>
        <asp:GridView ID="grdJSON2Grid2" runat="server" BackColor="White" BorderColor="#3399ff"
            BorderStyle="Dotted" BorderWidth="1px" CellPadding="3" GridLines="Both"></asp:GridView>
    </div>
    </form>
</body>
</html>


.CS
protected void Page_Load(object sender, EventArgs e)
        {
            //Random json string, No fix number of columns or rows and no fix column name.
            string myDynamicJSON = "[{'Member ID':'00012','First Name':'Vicki','Last Name':'Jordan','Registered Email':'vicki.j @tacinc.com.au','Mobile':'03 6332 3800','MailSuburb':'','MailState':'','MailPostcode':'','Engagement':'attended an APNA event in the past and ventured onto our online education portal APNA Online Learning','Group':'Non-member'},{'Member ID':'15072','First Name':'Vicki','Last Name':'Jordan','Registered Email':'vicki.j @tacinc.com.au','Mobile':'03 6332 3800','MailSuburb':'','MailState':'','MailPostcode':'','Engagement':'attended an APNA event in the past and ventured onto our online education portal APNA Online Learning','Group':'Non-member'}]";

            //Using dynamic keyword with JsonConvert.DeserializeObject, here you need to import Newtonsoft.Json
            dynamic myObject = JsonConvert.DeserializeObject(myDynamicJSON);
           
            //Binding gridview from dynamic object
            grdJSON2Grid.DataSource = myObject;
            grdJSON2Grid.DataBind();

            //Using DataTable with JsonConvert.DeserializeObject, here you need to import using System.Data;
            DataTable myObjectDT = JsonConvert.DeserializeObject<DataTable>(myDynamicJSON);

            //Binding gridview from dynamic object
            grdJSON2Grid2.DataSource = myObjectDT;
            grdJSON2Grid2.DataBind();
       
        }